To write a drum pattern for a game cue, choose a pulse, put a kick and snare on a few dependable beats, then use hats to show the subdivision. Make one bar that loops cleanly before adding a fill or a louder version. The 16-step exercise below gives you exact note positions you can enter in a sequencer; it is an illustrative composition exercise, not a transcription of a game soundtrack.
Choose the pulse and label the grid
Start with one bar of 4/4. Count its four beats as 1, 2, 3, 4. If you split each beat into four equal parts, say 1 e & a, 2 e & a, 3 e & a, 4 e & a. That gives you 16 places to put a hit. A closed hat on every numbered beat and every “&” uses eight of those places. The empty “e” and “a” slots remain available for a pickup or a fill.
Set any comfortable tempo for the example. The exact BPM is a design choice, not a rule for an adventure, combat, or puzzle cue. In Celeste, composer Lena Raine described keeping even faster scenes at a deliberately lower tempo with a breakbeat feel so the music matched the game’s pace; her reasoning is a useful reminder to choose tempo for the scene rather than a genre label. Read the interview with Raine and co-creator Noel Berry.
Use a one-bar loop while you place the first notes. A 16-step grid makes the timing visible, but you can enter the same events in a piano roll. Ableton’s beat lesson explains the kick, snare, and two hat sounds if those names are new to you.
Give each drum a job in the first bar
Put the kick on beats 1 and 3, the snare on beats 2 and 4, and a closed hat on every eighth note. This familiar backbeat is a starting point, not a claim that every game cue needs one. After11Audio’s drum-writing guide uses the same approach to teach each instrument’s role. Native Instruments also shows how moving drum hits changes a pattern’s feel across several styles in its pattern guide.
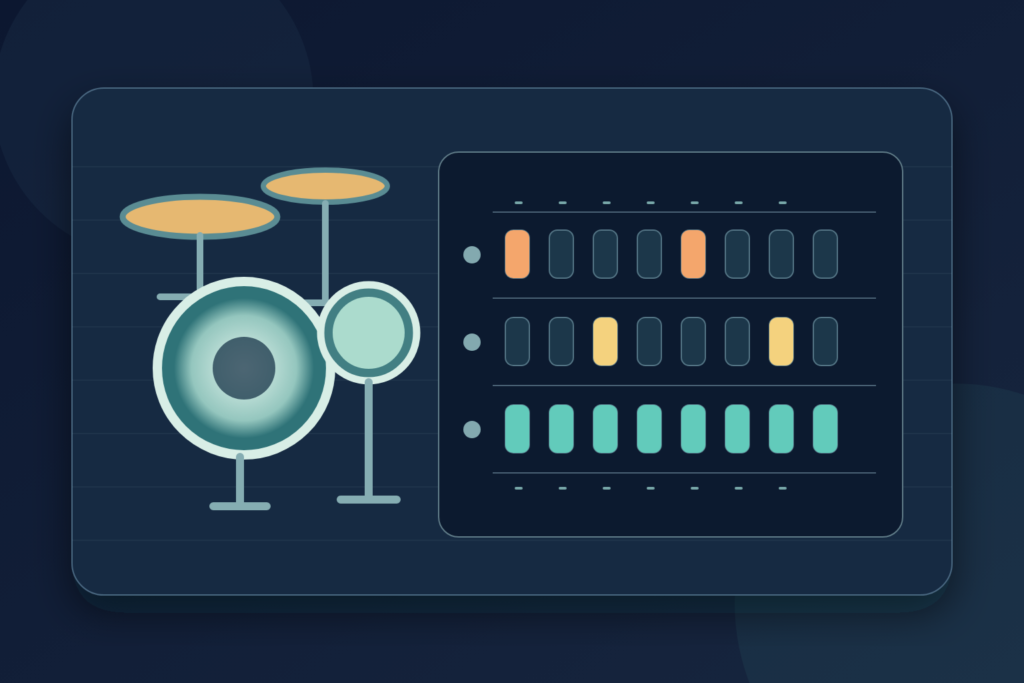
Here is the complete original bar. “X” means a hit; “.” means silence in that lane. Step 1 is beat 1, step 5 is beat 2, step 9 is beat 3, and step 13 is beat 4. Keep all 16 columns even if your sequencer displays only the used eighth notes.
| Lane | 1 | e | & | a | 2 | e | & | a | 3 | e | & | a | 4 | e | & | a |
|---|---|---|---|---|---|---|---|---|---|---|---|---|---|---|---|---|
| Kick | X | . | . | . | . | . | . | . | X | . | . | . | . | . | . | . |
| Snare | . | . | . | . | X | . | . | . | . | . | . | . | X | . | . | . |
| Closed hat | X | . | X | . | X | . | X | . | X | . | X | . | X | . | X | . |
The kicks mark the beginning and midpoint of the bar. The snares answer them on 2 and 4. The hats make the eighth-note pulse audible between those accents. Hit play on your own pattern, then mute one lane at a time. If the hat is drawing attention away from the melody, try quarter notes on 1, 2, 3, and 4 before adding any more percussion. If the snare is too assertive for an exploration scene, you can move it to beat 3, but treat that as a new groove and listen for the changed feel.
For a naturalistic kit, avoid writing simultaneous cymbal and tom parts that would require more hands than a drummer has. Ableton’s linear drumming chapter explains the difference between overlapping drum voices and a one-hit-at-a-time pattern. An electronic sound palette need not obey acoustic limb limits, but choosing the rule deliberately makes the arrangement easier to edit.
Fit the kick around the bass
Give the exercise a simple bass part: notes on beats 1 and 3, with a shorter pickup on the “&” of 4. The kick already meets the first two bass notes. Try a second copy of the bar with one extra kick on the “&” of 4, step 15. Leave the bass unchanged. Compare the two versions: the extra kick may give the return to beat 1 more push, or it may crowd the bass pickup. Keep whichever version supports the cue.
Do not automatically duplicate every bass onset in the kick lane. After11Audio describes matching kick and bass as one possible method, then adding or removing kicks. The exact choice depends on the musical phrase. If you need to write the pitched part first, the site’s bass-line exercise for game cues covers that separate job.
Check the low end with the melody and effects present, too. A kick that sounds satisfying alone can take attention from a short footstep, impact, or low-frequency gameplay cue. In this article’s exercise, that is a listening question for your own project, not a measured result. Keep a version without the pickup kick so you can compare in the actual game mix.
Make a sparse and an active version
Duplicate the bar twice and call the copies sparse and active. Keep the one-bar length and the kick on steps 1 and 9 in both. That shared downbeat pattern makes it easier to compare them when gameplay changes. This does not mean they will always transition cleanly in every engine; the transition still needs a test at the loop boundary. For a broader explanation of layers and switching, see the site’s adaptive music guide.
For the sparse version, remove the hats on steps 3, 7, 11, and 15. Four quarter-note hats remain on beats 1 through 4. Keep both snares for a recognizable pulse. Lowering a hat’s velocity is another way to reduce emphasis, but removal is easier to verify in this first exercise. If the scene needs more space, try muting the whole hat lane for one bar and decide whether the other instruments still carry the beat.
For the active version, restore the eight eighth-note hats. Add a kick on step 11, the “&” of beat 3, and add a soft closed hat on step 16, the “a” of beat 4. The new kick changes the second half of the bar while the snares remain on 2 and 4. Set the added hat quieter than the numbered-beat hats so it reads as a pickup. Use your sequencer’s velocity control; there is no universal value to copy across different samples.
Make a small change log as you work: sparse removes hats 3, 7, 11, 15; active adds kick 11 and hat 16 relative to the original bar. Now you can undo or recreate the variations without guessing. For more on expressive timing and velocity after the note placements are settled, read how to humanize MIDI in a game loop. Change the pattern first, then shape its performance.
Write a fill that reaches the next downbeat
Use the fourth bar of a four-bar phrase for a fill. Keep bars 1 to 3 on the original pattern. In bar 4, use kicks on steps 1 and 9, a snare on step 5, closed hats on steps 1, 3, 5, 7, 9, and 11, a high tom on step 13, and a low tom on step 15. Leave every other slot empty. The tom replaces the original snare on step 13. Return to the original bar after the fill. That is a modest signpost for the phrase boundary. It is an illustrative arrangement, not a claim that all game loops need a fill every four bars.
For a deliberately crowded alternative, start again from the original one-bar grid and add a snare, high tom, low tom, and crash on step 15 without removing its hat. On an acoustic-style kit that combination asks for more hand actions than one player can supply. Repair that copy by replacing its entire event list with the bar-4 list above. If desired, add a single crash alongside the original kick and hat on the next bar’s step 1. For an electronic cue, the same edit can still create useful space even when physical playability is irrelevant.
Listen to bar 4 followed by bar 1 several times in your own session. A fill that seems lively in isolation may make the loop seam too obvious when the player stays in one area. Try the phrase with and without the fill, and keep the simpler version when the music will repeat for a long stretch. DrumHelper’s guide to writing drum parts also recommends choosing fill placements to suit the song.
Check the repeat with the rest of the game
Export or preview the four-bar phrase in the context in which it will be used. First check the seam from bar 4 back to bar 1 with only drums. Then add bass and melody. Finally, check a version with representative gameplay effects at their intended levels. These are checks for you to perform; no listening test or in-game implementation was performed for this article.
Write down the bar count, tempo, meter, and where the sparse and active versions may switch. Keep their length identical and confirm that the shared kick anchors do not create doubled hits at the handoff. If the versions will be delivered as separate stems, the site’s stem delivery guide covers naming, alignment, and handoff. A complete worksheet should leave you with one core bar, two documented variants, an optional fourth-bar fill, and a repeat you have actually checked in your project.
FAQ: Writing drum patterns for game music
Where should a beginner put the kick and snare?
In 4/4, try kicks on beats 1 and 3 and snares on 2 and 4. Treat that backbeat as a starting grid, then move or remove hits to fit the cue.
How many steps does a one-bar drum pattern need?
A 4/4 bar divided into sixteenth notes has 16 slots. You can use fewer sounds; the empty slots are part of the pattern.
Should the kick always follow the bass?
No. Compare a version that shares bass onsets with one that leaves a bass pickup clear. Choose by listening in the full cue.
How can one groove support quiet and active gameplay?
Keep the phrase length and key downbeats consistent. Remove hats for a sparse version, or add selected hits for an active version, then test the change at the boundary.
How often should a game loop use a drum fill?
Use a fill when it marks a useful phrase or state change. Compare the loop with and without it, especially if players may hear the cue repeat for a long time.

Keep reading


Practical guides for game composers. Each guide links the documentation, published surveys and maker pages it relies on, so you can check the claims yourself. About us · Report an error